Houseplant enthusiasts and small-scale growers increasingly use tissue culture to propagate their favorite plants. Setting up a home tissue culture lab may seem daunting initially, but it can be a rewarding and straightforward process with the proper guidance and equipment. This step-by-step guide will walk you through everything you need to know to get started with tissue culture in the comfort of your home.
Why Choose Tissue Culture?
Before diving into the setup, it’s essential to understand why tissue culture is beneficial. Tissue culture allows for plants’ rapid and efficient propagation, producing disease-free and genetically uniform clones. This method propagates rare and difficult-to-grow plants, ensuring consistent quality and health.
Essential Equipment and Supplies
You’ll need some essential equipment and supplies to set up a home tissue culture lab. Here’s a list of what you’ll need:
- Laminar Flow Hood: Provides a sterile working environment by filtering air and preventing contamination.
- Autoclave or Pressure Cooker: Sterilizes media, tools, and containers.
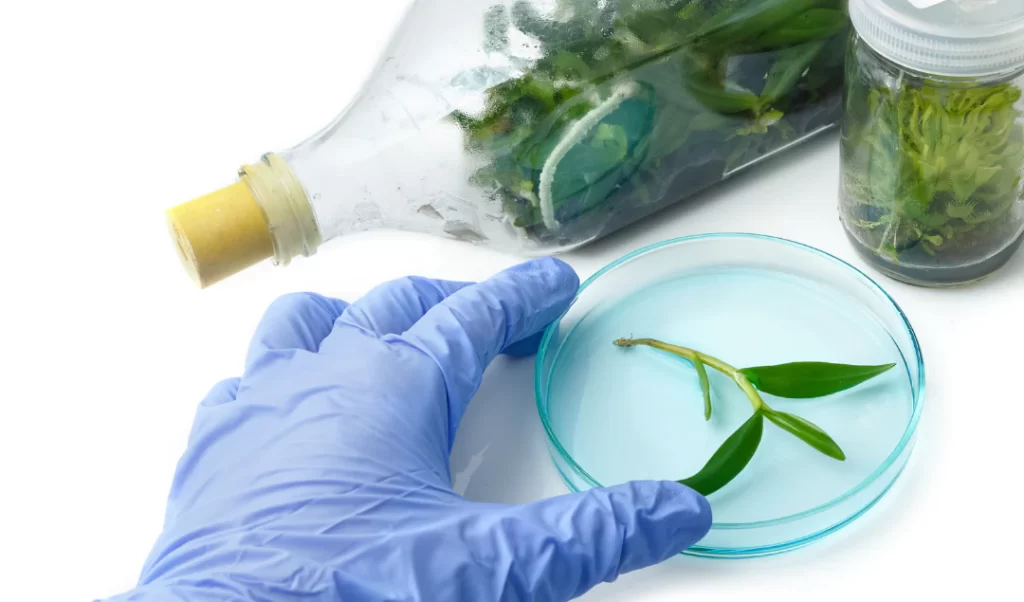
- Culture Vessels: Sterile jars or containers to grow your plant tissues.
- Scalpels and Forceps: For cutting and handling plant tissues.
- Sterilizing Agents: Ethanol and bleach solutions for surface sterilization.
- Growth Media: Nutrient-rich gel or liquid media to support plant growth.
- pH Meter: Ensures the correct pH level of your growth media.
- Heat Source: A microwave or hot plate for preparing media.
- Gloves and Lab Coat: Protects you and keeps the environment sterile.
Setting Up Your Lab Space
The first step in setting up your home tissue culture lab is to designate a clean, clutter-free area. A spare room or a dedicated corner of your house can work well. Ensure the space is well-ventilated and free from dust and contaminants.
- Install the Laminar Flow Hood: Place the laminar flow hood on a sturdy table or bench. This will be your primary work area. Ensure it is plugged in and functioning correctly.
- Organize Your Equipment: Arrange your autoclave or pressure cooker, culture vessels, tools, and sterilizing agents within easy reach. Having everything organized will streamline your workflow.
- Set Up a Sterilization Station: Designate an area for sterilizing your tools and media. This station should include your autoclave or pressure cooker, sterilizing agents, and a heat source.
Preparing Growth Media
Growth media is the nutrient-rich substance that will support your plant tissues as they grow. Here’s how to prepare it:
- Mix the Ingredients: Combine the required nutrients, vitamins, and hormones according to your chosen recipe. Agar is commonly used to solidify the media.
- Adjust the pH: Use your pH meter to check the pH level of the media. Adjust it to the desired level (usually around pH 5.8) using a pH buffer solution.
- Sterilize the Media: Pour the prepared media into culture vessels and sterilize them using an autoclave or pressure cooker. Ensure they are sealed tightly to prevent contamination.
Sterilizing Plant Materials
Sterilizing the plant material is crucial to prevent contamination. Follow these steps:
- Select Healthy Plant Material: Choose a healthy, disease-free plant as your source material. Young, actively growing tissues are ideal.
- Surface Sterilize: Submerge the plant material in a bleach solution (10-20% bleach) for about 10-15 minutes. Rinse thoroughly with sterile distilled water to remove any residual bleach.
- Work Under Sterile Conditions: Transfer the sterilized plant material to the laminar flow hood for further processing.
Initiating Cultures
Now that your growth media and plant material are ready, it’s time to initiate the cultures:
- Prepare Explants: Use sterilized scalpels and forceps to cut small pieces (explants) from the plant material. These pieces should be about 1-2 cm in size.
- Inoculate the Explants: Place the explants onto the prepared growth media in the culture vessels. Ensure they are in contact with the media to facilitate nutrient uptake.
- Seal and Label: Seal the culture vessels with sterile lids or plastic wrap. Label each vessel with the date and plant species for tracking purposes.
Maintaining Cultures
Once the cultures are initiated, proper maintenance is essential for successful growth:
- Monitor for Contamination: Regularly check your cultures for signs of contamination, such as fungal or bacterial growth. Discard any contaminated cultures to prevent the spread.
- Provide Appropriate Light: Place the culture vessels under a light source for 12-16 hours daily. Fluorescent lights or LED grow lights work well.
- Maintain Temperature and Humidity: Keep the cultures in an environment with a stable temperature (around 25°C) and moderate humidity.
Subculturing and Transplanting
As the plant tissues grow, they will need to be transferred to fresh media or larger containers:
- Subculture: When the explants outgrow their initial vessels, transfer them to new vessels with fresh media. This process is called subculturing and promotes continued growth.
- Acclimatize Plants: Once the plantlets have developed roots and shoots, gradually acclimatize them to normal growing conditions. Start by removing the culture vessel’s lid and exposing it to ambient conditions for short periods.
- Transplant to Soil: After acclimatization, transplant the plantlets to soil or a suitable growing medium. Please continue to monitor their growth and provide appropriate care.
Conclusion
Setting up a home tissue culture lab can be rewarding and efficient for propagating houseplants. You can successfully grow healthy, disease-free plants with the right equipment, sterile techniques, and careful monitoring. Whether you’re a hobbyist or a small-scale grower, tissue culture offers a fascinating and productive method for expanding your plant collection. Start your tissue culture journey today and enjoy the benefits of this innovative propagation technique.Houseplant enthusiasts and small-scale growers increasingly use tissue culture to propagate their favorite plants. Setting up a home tissue culture lab may seem daunting initially, but it can be a rewarding and straightforward process with the proper guidance and equipment. This step-by-step guide will walk you through everything you need to know to get started with tissue culture in the comfort of your home.
Why Choose Tissue Culture?
Before diving into the setup, it’s essential to understand why tissue culture is beneficial. Tissue culture allows for plants’ rapid and efficient propagation, producing disease-free and genetically uniform clones. This method propagates rare and difficult-to-grow plants, ensuring consistent quality and health.
Essential Equipment and Supplies
You’ll need some essential equipment and supplies to set up a home tissue culture lab. Here’s a list of what you’ll need:
- Laminar Flow Hood: Provides a sterile working environment by filtering air and preventing contamination.
- Autoclave or Pressure Cooker: Sterilizes media, tools, and containers.
- Culture Vessels: Sterile jars or containers to grow your plant tissues.
- Scalpels and Forceps: For cutting and handling plant tissues.
- Sterilizing Agents: Ethanol and bleach solutions for surface sterilization.
- Growth Media: Nutrient-rich gel or liquid media to support plant growth.
- pH Meter: Ensures the correct pH level of your growth media.
- Heat Source: A microwave or hot plate for preparing media.
- Gloves and Lab Coat: Protects you and keeps the environment sterile.
Setting Up Your Lab Space
The first step in setting up your home tissue culture lab is to designate a clean, clutter-free area. A spare room or a dedicated corner of your house can work well. Ensure the space is well-ventilated and free from dust and contaminants.
- Install the Laminar Flow Hood: Place the laminar flow hood on a sturdy table or bench. This will be your primary work area. Ensure it is plugged in and functioning correctly.
- Organize Your Equipment: Arrange your autoclave or pressure cooker, culture vessels, tools, and sterilizing agents within easy reach. Having everything organized will streamline your workflow.
- Set Up a Sterilization Station: Designate an area for sterilizing your tools and media. This station should include your autoclave or pressure cooker, sterilizing agents, and a heat source.
Preparing Growth Media
Growth media is the nutrient-rich substance that will support your plant tissues as they grow. Here’s how to prepare it:
- Mix the Ingredients: Combine the required nutrients, vitamins, and hormones according to your chosen recipe. Agar is commonly used to solidify the media.
- Adjust the pH: Use your pH meter to check the pH level of the media. Adjust it to the desired level (usually around pH 5.8) using a pH buffer solution.
- Sterilize the Media: Pour the prepared media into culture vessels and sterilize them using an autoclave or pressure cooker. Ensure they are sealed tightly to prevent contamination.
Sterilizing Plant Materials
Sterilizing the plant material is crucial to prevent contamination. Follow these steps:
- Select Healthy Plant Material: Choose a healthy, disease-free plant as your source material. Young, actively growing tissues are ideal.
- Surface Sterilize: Submerge the plant material in a bleach solution (10-20% bleach) for about 10-15 minutes. Rinse thoroughly with sterile distilled water to remove any residual bleach.
- Work Under Sterile Conditions: Transfer the sterilized plant material to the laminar flow hood for further processing.
Initiating Cultures
Now that your growth media and plant material are ready, it’s time to initiate the cultures:
- Prepare Explants: Use sterilized scalpels and forceps to cut small pieces (explants) from the plant material. These pieces should be about 1-2 cm in size.
- Inoculate the Explants: Place the explants onto the prepared growth media in the culture vessels. Ensure they are in contact with the media to facilitate nutrient uptake.
- Seal and Label: Seal the culture vessels with sterile lids or plastic wrap. Label each vessel with the date and plant species for tracking purposes.
Maintaining Cultures
Once the cultures are initiated, proper maintenance is essential for successful growth:
- Monitor for Contamination: Regularly check your cultures for signs of contamination, such as fungal or bacterial growth. Discard any contaminated cultures to prevent the spread.
- Provide Appropriate Light: Place the culture vessels under a light source for 12-16 hours daily. Fluorescent lights or LED grow lights work well.
- Maintain Temperature and Humidity: Keep the cultures in an environment with a stable temperature (around 25°C) and moderate humidity.
Subculturing and Transplanting
As the plant tissues grow, they will need to be transferred to fresh media or larger containers:
- Subculture: When the explants outgrow their initial vessels, transfer them to new vessels with fresh media. This process is called subculturing and promotes continued growth.
- Acclimatize Plants: Once the plantlets have developed roots and shoots, gradually acclimatize them to normal growing conditions. Start by removing the culture vessel’s lid and exposing it to ambient conditions for short periods.
- Transplant to Soil: After acclimatization, transplant the plantlets to soil or a suitable growing medium. Please continue to monitor their growth and provide appropriate care.
Conclusion
Setting up a home tissue culture lab can be rewarding and efficient for propagating houseplants. You can successfully grow healthy, disease-free plants with the right equipment, sterile techniques, and careful monitoring. Whether you’re a hobbyist or a small-scale grower, tissue culture offers a fascinating and productive method for expanding your plant collection. Start your tissue culture journey today and enjoy the benefits of this innovative propagation technique.


